
You can create tickets in smartQ via email by manually sending the emails to the smartQ tickets email address, but you can also automate it via email forwarding. This allows, for example, to create tickets from any email coming to a specified email box, or even create tickets in corresponding projects/boards, depending on conditions (like where the emails are coming from). The post below explains how.
While this post is using Gmail as an example, such forwarding and filters can be set up in any other email client.
Let’s say you have a Gmail account, and you want every received email in that email box to create a ticket in smartQ. That’s a typical setup for a Help desk.
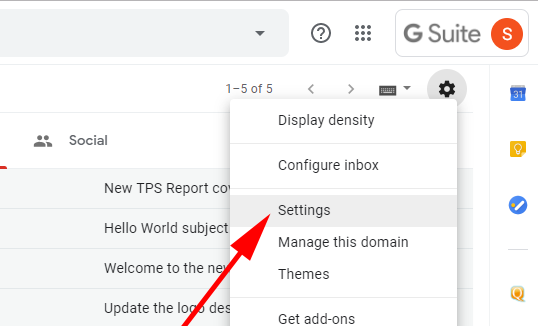
To setup email forwarding in Gmail, go to Settings:
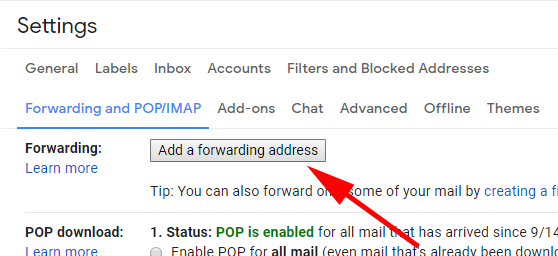
…then to Forwarding and POP/IMAP and the click “Add a forwarding address”:
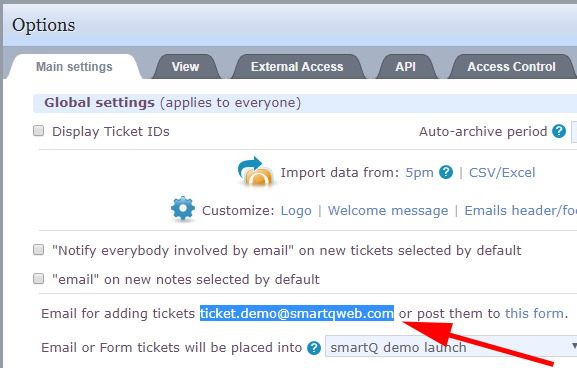
You have to enter here the smartQ email for posting tickets. The default one can be found in Options/Main Settings:
Via this email tickets are added to the default board. Please note, it only applies to registered smartQ users. If you are using External Users (users not registered in your smartQ account), make sure this feature in enabled via External Access tab:
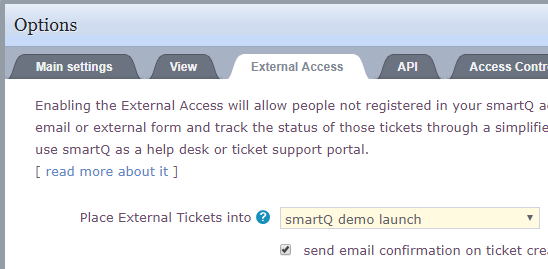
Most of the time you will use the email forwarding to capture emails from any senders, not just smartQ users. In this case, make sure you turn ON the External Access BEFORE you setup your email forwarding.
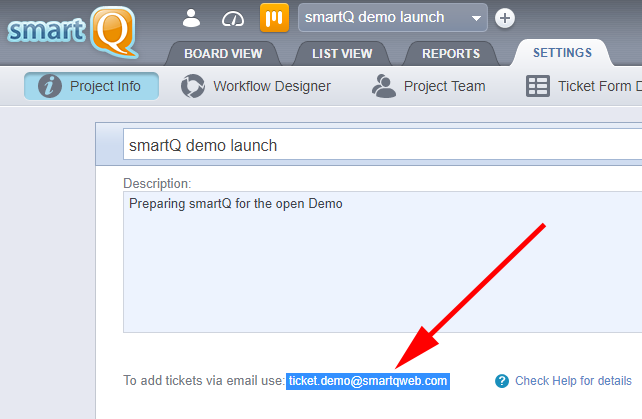
You can also create tickets in any board by using the direct project email, located in the Settings/Project Info tab:
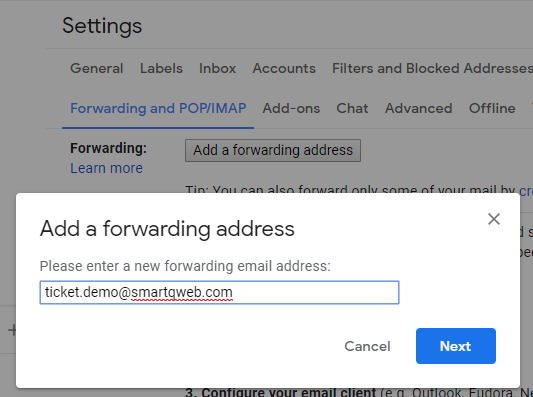
Copy the email from smartQ and then return to Gmail to paste it there, after you click the “Add a forwarding address” button:
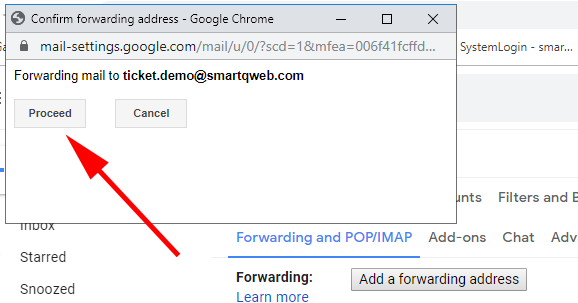
It will ask for a confirmation:
… and you are done:
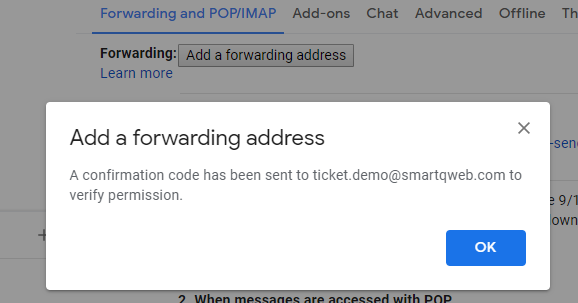
After that you simply have to verify that email address.
Since Gmail sends the confirmation email to your smartQ board, it will end up as a ticket on it:
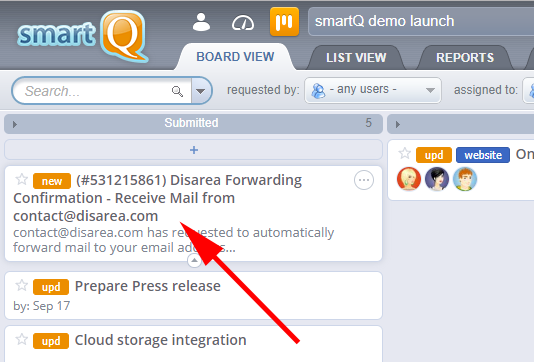
It may take up to a couple of minutes to see the ticket. If it does not appear, check if your Gmail email is linked to a user in smartQ and, if not, make sure you have External Access enabled.
Also, make sure to check the correct board — External Users default board (marked with the “E” in the projects list) can be different from the global default board (marked in bold in the projects list).
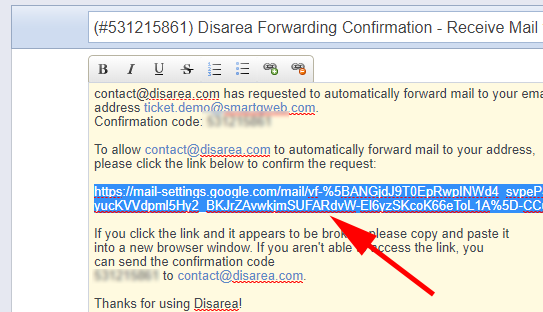
Open that ticket and follow the instructions: either copy the confirmation code to enter in Gmail or just click the confirmation link (you can delete this ticket after the confirmation is done):
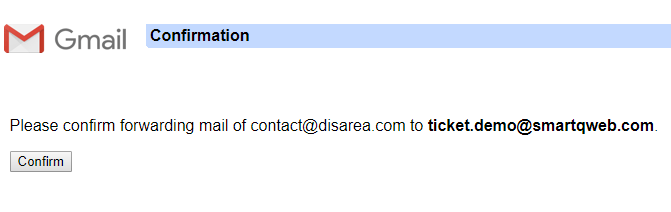
Just finish the confirmation in Gmail:
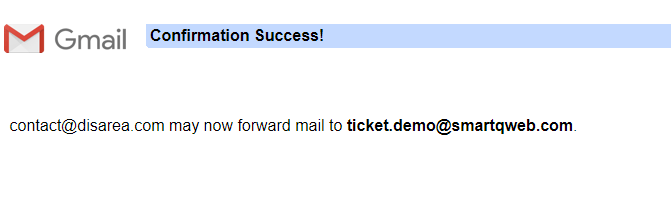
… and you are done!
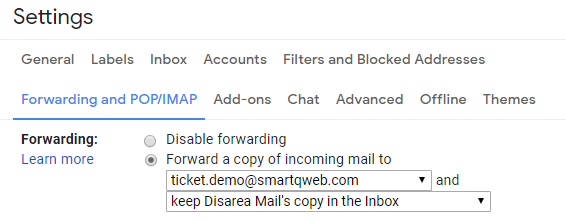
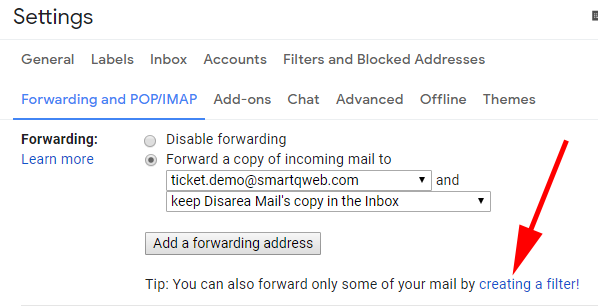
That’s it — your forwarding it set up. You can check the forwarding setup in your Gmail Settings / Forwarding and POP/IMAP tab:
This is a fairly straightforward setup. It can be used to create tickets from any incoming emails. It works well for processing any kind of email requests in smartQ.
Now, what if we want a more complex setup: not simply creating all tickets on one board, but placing them into different projects in smartQ, depending on specific conditions.
This can be done via Gmail filters:
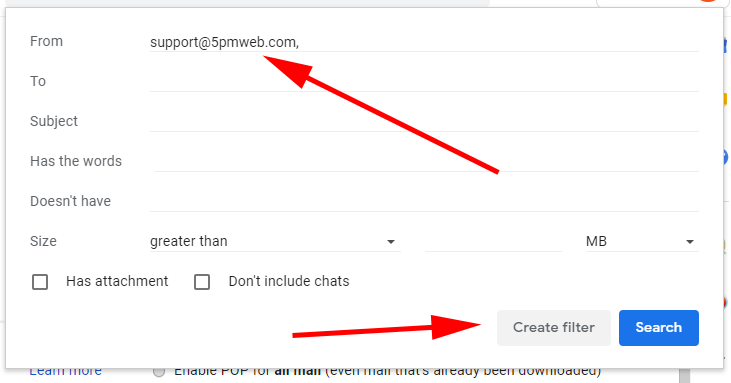
Google offers different conditions, but, in our case, we simply chose the one based on the sender’s email:
On the next screen you will define what will happen when the email matching those conditions is received:
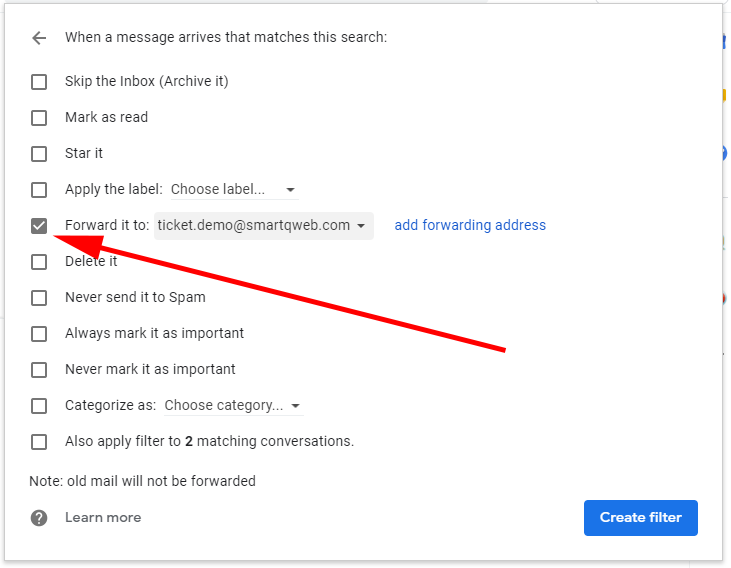
Select the “Forward” option. You will be able to select any of the emails set for forwarding — you can have multiple ones in Gmail. Click “add forwarding address” if you need to add a new one, for a specific board in smartQ. The direct board email can be found in Settings/Project Info — just follow the instructions provided above for adding and confirming a forwarding email in Gmail.
You can create multiple filters — one for each smartQ board, for example.
To check existing Gmail filters, go to the Filters and Blocked Addresses tab:

That’s all! While it looks like many steps, it is actually easy to set up and you only need to do it once to automate your workflow with emails.
And, consider also checking the Automation feature in smartQ
— it allows you to automate tickets, once they are in smartQ, including the ones created via email!
If you are having issues with your setup — simply email us at support[at]getsmartQ.com!
Other links to check: